FIELD NOTES / 01 / English guide
Transport Fever 3 Beginner Guide: Build a Network That Actually Works
A practical first-hour route through map choice, station construction, your first bus and cargo services, operating costs, and a town that can use them.
Updated Oct 11, 2026 · Based on official manuals and public tutorials, with key material rechecked. Version differences are noted; not individually playtested.
On this page
The first useful milestone in Transport Fever 3 is a completed journey. A resident reaches a destination, or a delivery reaches a consumer, and you can explain how your service made that happen. Roads, stations, and vehicles are the means of getting there.
This beginner guide follows a small project rather than a countdown. We will give one town a useful passenger connection, add one delivery, then decide whether the network deserves more investment. You can pause throughout construction. The “first hour” is a learning session, not a requirement to finish before a particular in-game date.
01 / Choose a learning project before choosing a map
For a guided introduction, use the early campaign missions. For a project you control, start a free game and review its tutorial option in the Environment settings. Keep the tutorial available if you have never placed a station or assigned a vehicle. The official free-game manual explains that setup.
Pick a project you can describe: “connect the west-side homes to the shopping district” is enough. Avoid making your first exercise a railway, harbor, feeder network, and industrial chain all at once. Each extra system adds another possible failure before you have a reliable baseline.
Name the save after the exercise, and keep a separate save before major changes. This makes experimentation practical: you can return to the same conditions instead of comparing two unrelated maps.
02 / Find a map with an inexpensive first connection
Look for an existing road between useful endpoints, manageable terrain, and industries close enough to inspect. A large resource-rich world can be interesting later; initially, you need to recognize where people live and where goods are wanted.
The starting year controls which vehicles you can buy. Difficulty affects your costs and the room available for mistakes. Neither should be copied blindly from a video: a route planned around an unavailable bus or a different cost preset is a different experiment.
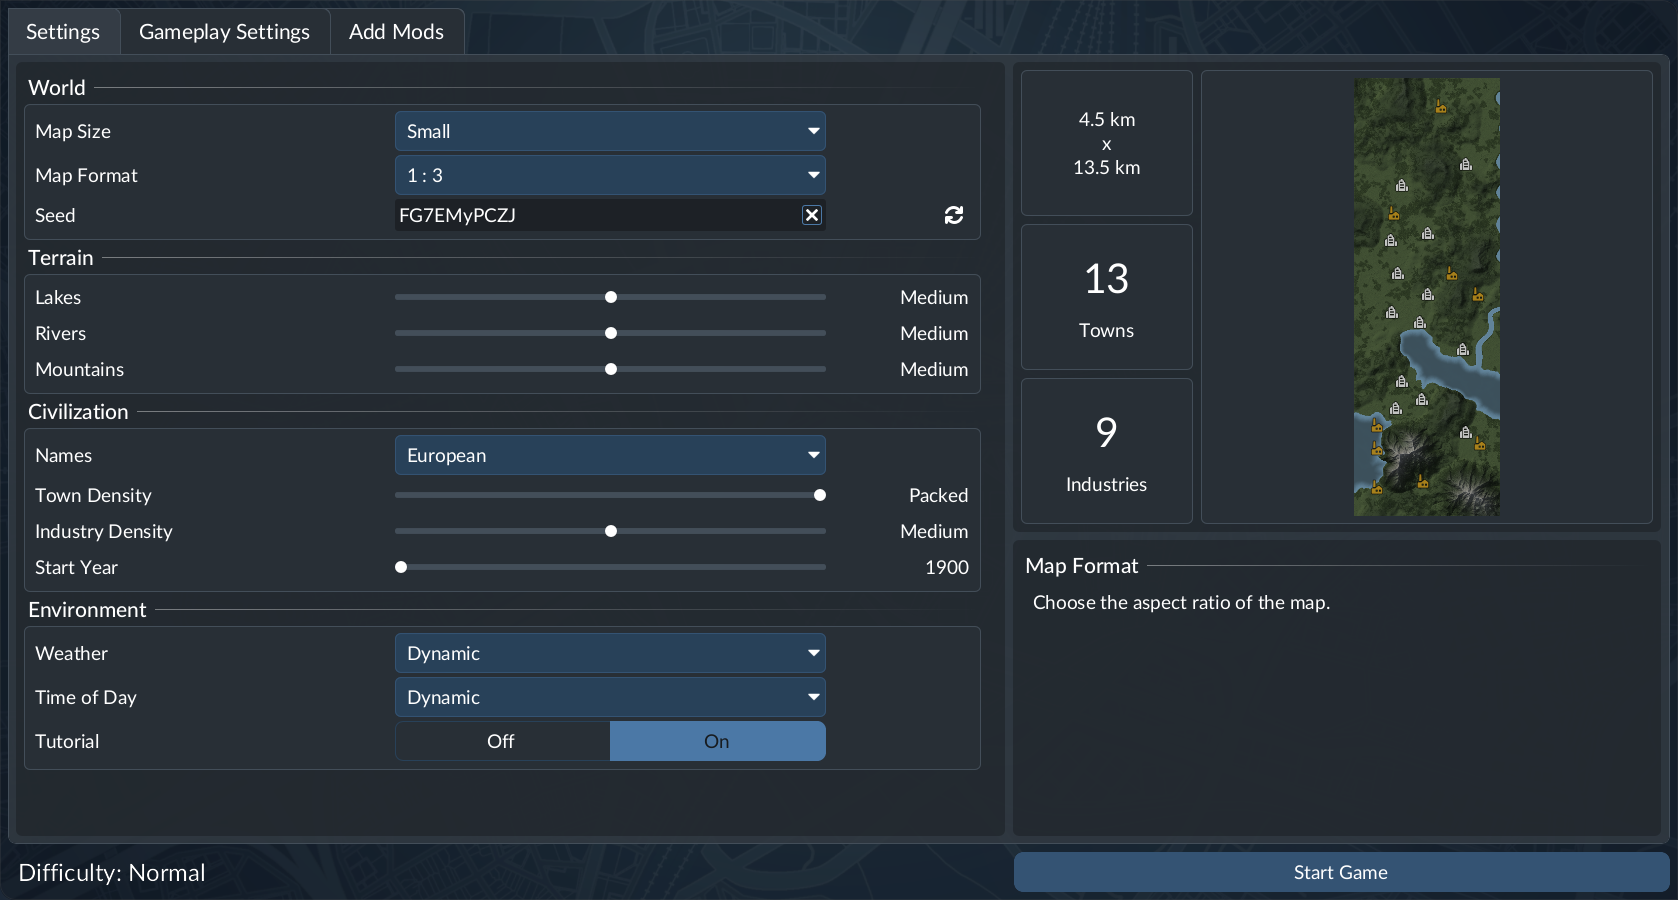
Review the world settings before planning around a particular vehicle. Official manual image, © Urban Games.
Use terrain as a cost filter. A nearby city across a steep ridge may need more investment than a slightly more distant destination along a connected road. Compare the usable route, not just the distance between town labels.
03 / Read the town as a set of journeys
Pause and locate residential, commercial, and industrial areas. Residents need access to destinations; your station should cover an origin and another useful destination. Two stops covering the same collection of homes do not automatically create a worthwhile trip.
If you prefer an intercity opening, examine travel toward neighboring towns and look for journeys your service could improve. The official starting tips suggest a direct bus connection between nearby towns. It remains a candidate, not a guarantee of profit.
Write a four-part plan: origin, destination, transport type, and purpose. If one part is unknown, investigate before buying vehicles. This also gives you a clear line name when the network grows.
04 / Set a construction limit and leave correction money
List the necessary stations, depot, road connections, and initial vehicles. Then allow for running costs while the service starts operating. Cash spent on a station cannot also pay the bus that uses it.
If startup funds require a loan, compare the offered amount, term, rate, and repayment shown in your current game. Borrow for a defined project. A new loan increases cash while also increasing obligations; it is not transport income.
For a planning exercise, suppose you reserve 60 budget units for construction and vehicles and keep 40 for operations and corrections. These are illustrative units, not game prices. The important decision is to preserve enough flexibility to move a bad station or reconnect a depot without immediately borrowing again.
05 / Construct the smallest service you can verify
Open the road transport tool and its Buildings tab. Select a passenger-capable stop, preview it beside the origin road, check coverage and construction warnings, then place it. Repeat at the destination. For a larger bus station, check its vehicle entrance and exit as well as the passenger terminal.
Build a road depot on the same usable network. In Line Manager, create a new line with the two stops. Inspect both directions of the displayed route. Select Buy Vehicles, purchase a passenger vehicle from a reachable depot, and confirm its assigned line.
That sequence is construction → connection → line → vehicle. Follow the illustrated station-building walkthrough if you need the menu and placement steps. Buying a bus before these connections exist makes diagnosis harder.
06 / Watch one complete trip before changing the fleet
Resume at a pace that lets you follow the first vehicle. Watch it leave the depot, stop at the origin, reach the destination, and return. Then repeat the observation over several trips to separate an isolated empty run from persistent lack of use.
| What you see | What to inspect next | What a useful improvement looks like |
|---|---|---|
| Vehicle never leaves the depot | Assignment and the depot exit | It enters its first service stop |
| Vehicle completes the route empty | Origins, destinations, and pedestrian access | Actual passengers use the connection |
| One direction is busy | Return demand and route shape | Fleet size matches the whole cycle |
| Queues grow despite full vehicles | Delays, headway, and capacity | Later departures clear the backlog |
Keep a short log: loaded passengers, location of the longest delay, and what happened at the destination. Change one thing at a time. Adding two buses while moving both endpoints may improve results, but it will not tell you which change mattered.
07 / Add one delivery with a real receiver
Open the town's Supplies information and identify a specific demand. Find an industry with actual output of that cargo. A road-accessible vegetable producer and a commercial district demanding vegetables can form a simple exercise; use a different pair if your map does not provide that combination.
Place the pickup and delivery stops so they serve their respective cargo locations. Create the line, allow the correct cargo at pickup, buy a compatible vehicle, and follow loading through normal delivery. Start with straightforward loading behavior so a missing supply is not hidden behind endless full-load waiting.
A processor requires another step: its inputs must arrive before you can expect finished output. Read the cargo and production-chain guide, and use the cargo-not-loading checklist when the first stage fails.
08 / Expand a working town, not just a collection of routes
You now have two different tests. The transport test asks whether passengers and goods arrive where they are needed. The business test asks whether the company can afford the service. Line income alone does not settle the second question because facilities, investment, and debt also affect cash.
Use making money to review a stable operating period before another major purchase. Then use town operations to connect homes, jobs, shopping, and deliveries into a useful local network.
Your next project should solve something you observed: an unserved district, a genuine queue, or an industry missing an input. Before adding it, state what success will look like. “Two more routes” is a construction target; “residents can reach the southern jobs without a long transfer wait” is a service target.