FIELD NOTES / 02 / English guide
How to Build Stations in Transport Fever 3: Stops, Terminals, and Connections
Build a passenger stop, cargo station, or railway station from the construction menu, connect its access, assign a line, and extend it when demand grows.
Updated Oct 11, 2026 · Based on official manuals and public tutorials, with key material rechecked. Version differences are noted; not individually playtested.
On this page
A station needs to serve two networks: the vehicles approaching it and the people or cargo using it. This construction guide treats those as separate jobs. You will first build a two-stop bus service, then use the same logic for a freight stop and a railway station.
Start with the simplest useful station for the exercise. A large terminal adds choices about entrances, platforms, and capacity before you have confirmed that anybody needs the route.
01 / Choose the station by its job
Use the appropriate transport construction tool, then open Buildings. A road stop belongs on the road network; a railway station belongs on rail. Check passenger and cargo categories instead of relying on the building's appearance.
A small roadside stop is useful for an initial bus connection. A larger bus or tram station provides more terminal and access options when several services meet. Freight requires cargo-capable facilities and vehicles. A combined station can support both roles, but the terminal used by a particular line still matters.
For rail, decide whether trains should pass through the site or terminate there. Consider the direction of the future tracks before placing the station. A beautiful station pointing across your intended alignment creates avoidable work.
02 / Place a roadside passenger stop from the menu
Use a hypothetical pair of destinations: Riverside Homes and Market Square. Pause before construction.
- Open the road transport tool, then Buildings, and choose a passenger-capable roadside stop available in your year.
- Move the preview to the street beside Riverside Homes. Let it attach to the road rather than floating near it.
- Check which buildings the preview serves and which side of the road the vehicle will use.
- Read construction conflicts and the cost preview. Try another position if unnecessary demolition is highlighted.
- Click to build, exit placement, and select the completed stop to check its connections.
- Repeat beside Market Square, then give both stops recognizable names.
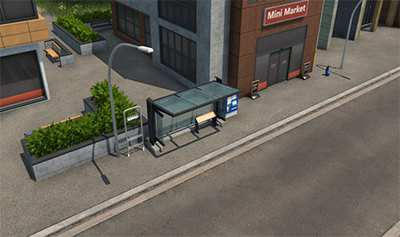
A roadside stop is enough for a first construction exercise. Official manual image, © Urban Games.
Opposite-side roadside stops may be grouped into one station on the same street section. That does not remove the need to inspect the actual stopping terminal and direction when adding the station to a line.
03 / Build a terminal when multiple services need one
Select the larger passenger station and review its initial platform settings. Choose a modest arrangement for the first service, while leaving room for a future entrance or terminal. Place it so the vehicle access faces the road you intend to use.
With default keyboard controls, M and N rotate constructions; comma and period adjust height. The placement UI is your reference if you have remapped keys. Preview changes before committing construction, particularly where terrain adjustment or demolition is involved.
After placement, connect the actual vehicle entrance and exit. A short missing road segment is enough to break an otherwise plausible terminal. Trace the approach from the street into the terminal and the departure back out, including one-way restrictions.
04 / Test the passenger side separately
Select the stop and inspect the served buildings. Passenger access requires a usable pedestrian connection. A nearby building separated by an awkward barrier or major detour may not have the relationship you intended.
Inspect each endpoint in turn: the origin should reach homes, while the destination should reach useful shopping or work locations. Do not infer that all three jobs are solved because the station's radius overlaps a town label.
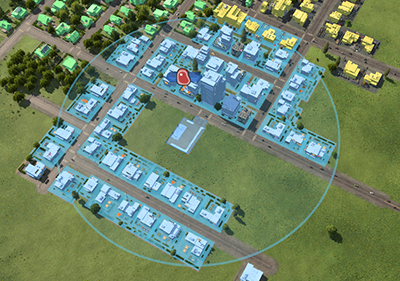
Use the building connections to assess placement, then verify an actual journey. Official manual image, © Urban Games.
A transfer deserves its own test. Follow the route from the arriving service to the onward terminal. Moving the two stops closer visually may not help if the pedestrian path remains broken.
05 / Turn the two buildings into a working bus service
Build a road depot and connect it to the same usable network. The depot buys vehicles; the passenger stop handles boarding. Their roles are different even if both sit on the same road.
Open Line Manager, choose New Line, and add Riverside Homes followed by Market Square. The vehicle returns from the last listed stop to the first. Inspect that return path before buying.
Select the line and Buy Vehicles. Confirm that the selected depot can reach it, purchase a passenger bus for a trial, and check the assigned line in the vehicle information. If you purchased directly from a depot, assign the vehicle explicitly.
Follow a complete loop. Failure to reach the first stop points toward the depot or route; arrival with no useful boarding points toward passenger access or destination choice. Use the bus-line walkthrough for operating checks.
06 / Adapt the placement test for freight
Find a producer with available output and a receiver demanding that exact cargo. Build a cargo-capable road station at each end, check their cargo connections, and connect the vehicle approaches.
Create a pickup-to-receiver line. At pickup, allow the intended cargo; buy a truck that can actually carry it. At delivery, confirm that the cargo reaches its consumer through normal unloading. Avoid interpreting a forced-empty vehicle as evidence of acceptance.
A transfer between services is another job. If your delivery ends at a storage point, configure a compatible warehouse and an onward line. A larger road terminal cannot substitute for the warehouse transfer arrangements.
07 / Build the railway station around the train's path
Choose passenger or freight use, through or terminus form, initial tracks, and platform length. Plan for the full consist rather than only the locomotive. Place the station aligned with the intended route, then connect the actual track ends.
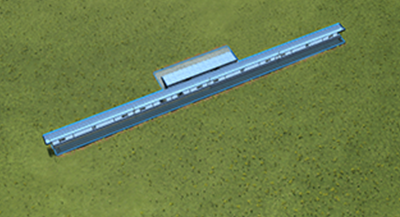
Align the station first; connect its track ends afterward. Official manual image, © Urban Games.
Passenger rail needs access from the town as well. Inspect the station building entrance and local feeder connection. Track access lets the train arrive; pedestrian and feeder access let residents use it.
Connect a train depot, create the line, buy a compatible locomotive and passenger or cargo consist, and run one train through the whole route. Check traction requirements against the actual track. Before sharing the route with another train, read the railway signal guide.
08 / Extend one bottleneck at a time
Select an existing station and Configure. Choose the appropriate module and an allowed attachment position, then complete configuration. Save before removing modules so you can recover if the change disrupts a live line.
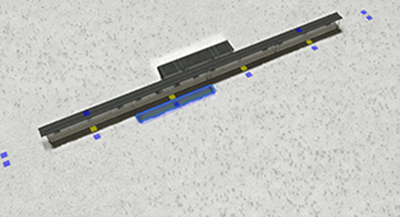
Extend at valid module connections, then recheck affected lines. Official manual image, © Urban Games.
Identify the bottleneck first. Platform length, waiting space, and vehicle throughput are different constraints. Adding waiting capacity does not make delayed buses arrive sooner. Adding a terminal does not help a line still assigned to an unreachable old position.
09 / Finish with a service test
The construction is ready when the intended buildings can use the station, vehicles can enter and depart, the selected terminal supports the service, and an assigned vehicle completes actual transport. Check warnings after every major access or track change.
Keep this test small. A completed two-stop service is a better construction baseline than a huge hub you cannot yet explain. Continue with making money once placement and movement work.